How to integrate Zapier with MSG91?
To get started with MSG91 on Zapier, first you will need to connect your MSG91 account to use with your Zap.
Follow the below mentioned simple steps to integrate Zapier with MSG91:
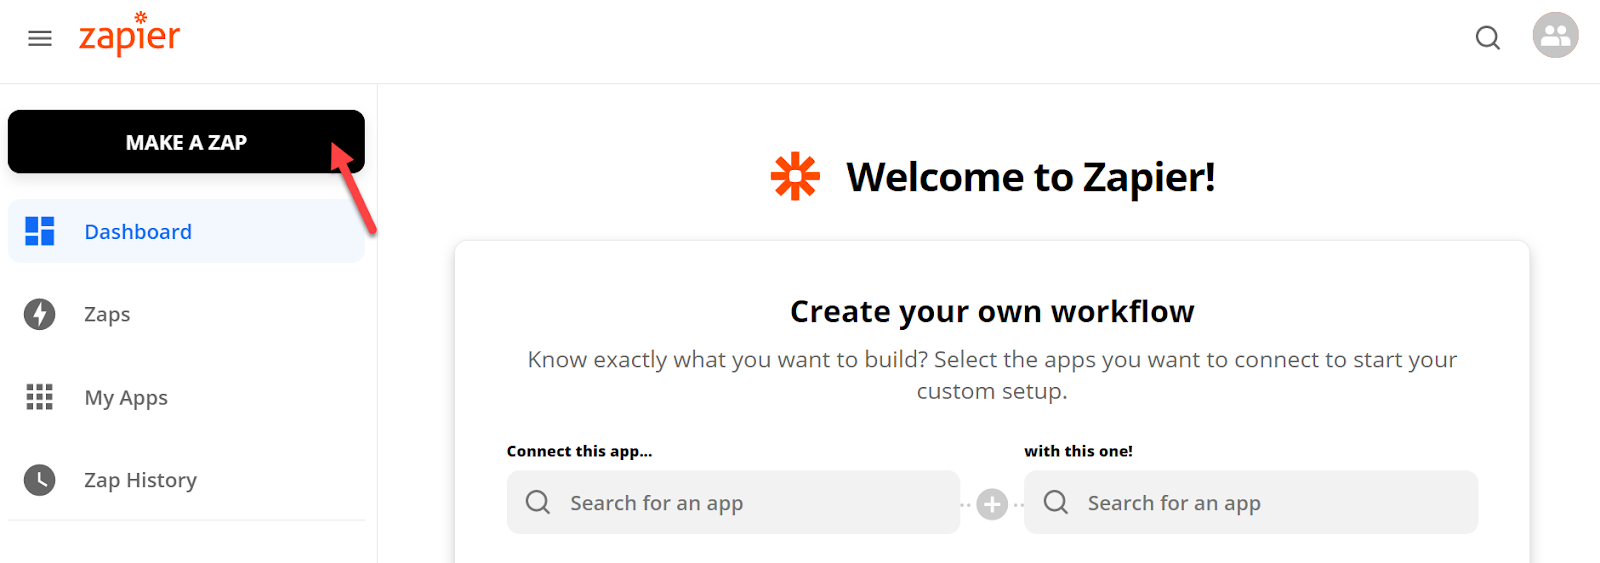
1. Log in to Zapier or simply sign up and click on the ‘Make a Zap’ option.
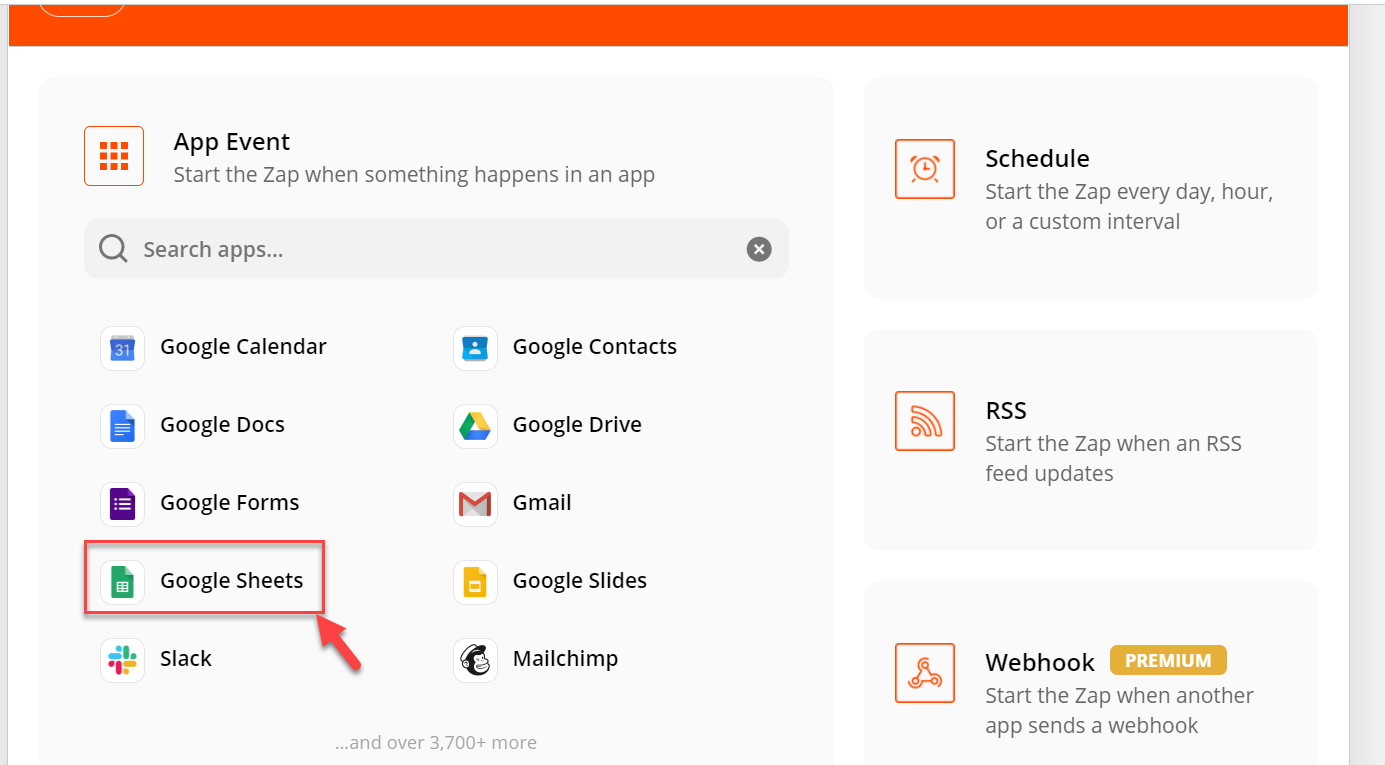
2. Select the Google Sheets option under App Event. As of now we are providing service with google sheet only.
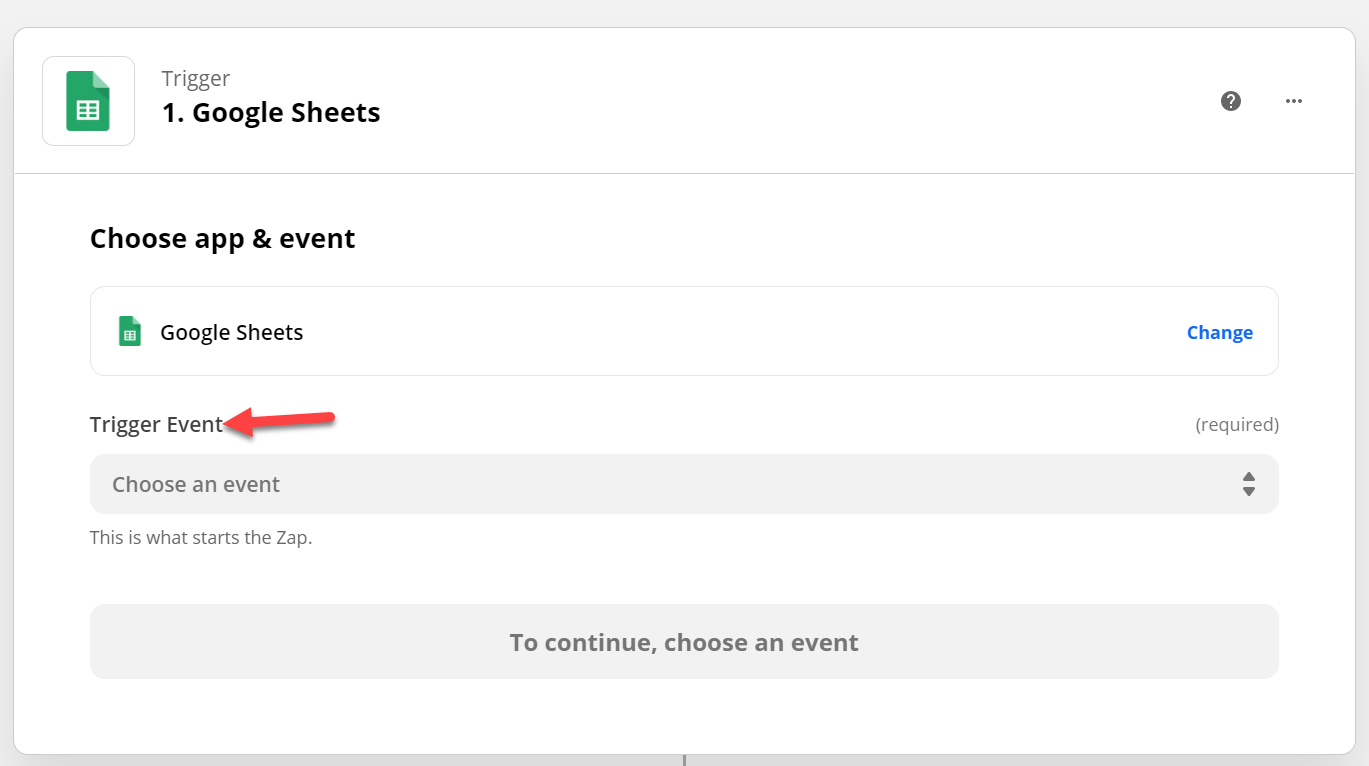
3. Once you’ve selected Google Sheets you’ll need to add a Trigger Event from the drop down list.
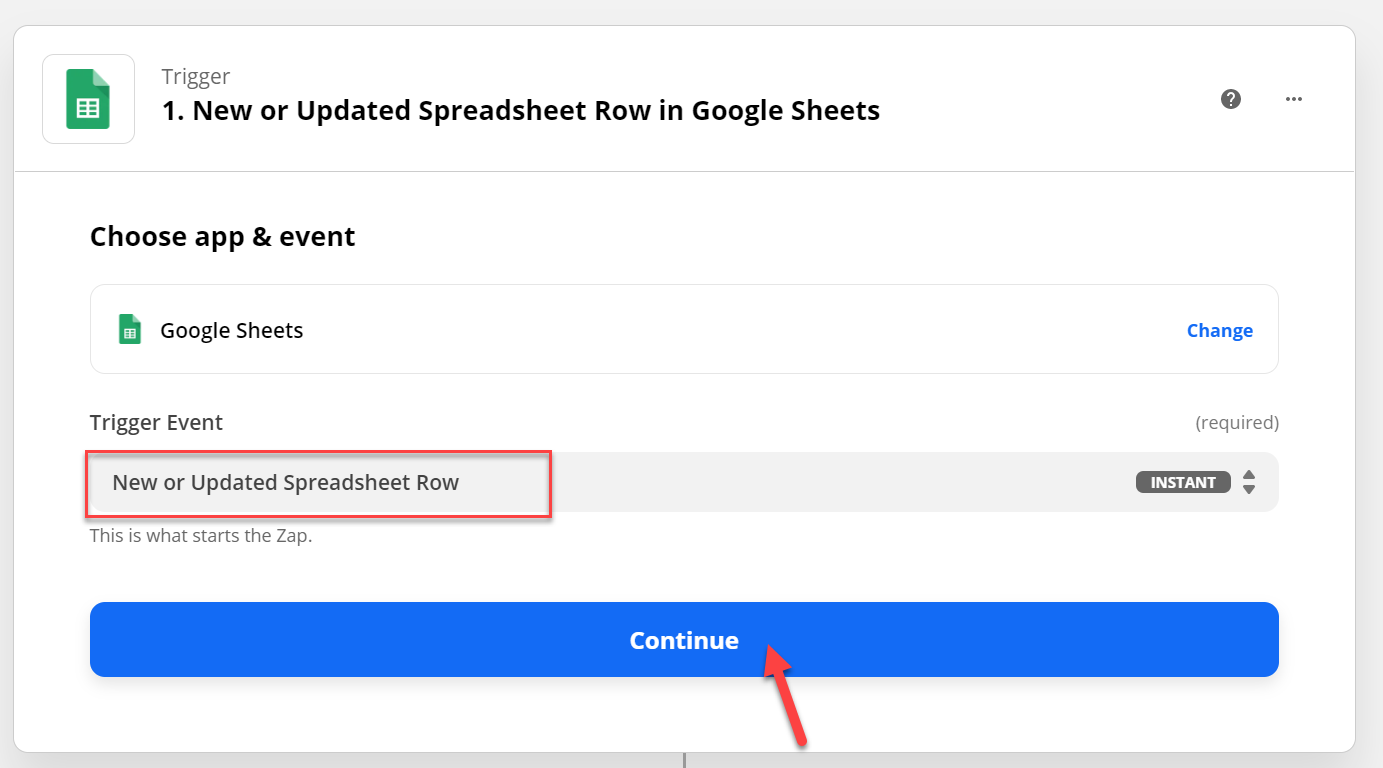
4. Select ‘New or Updated Spreadsheet Row’ from the Trigger Event drop-down list and click ‘Continue’.
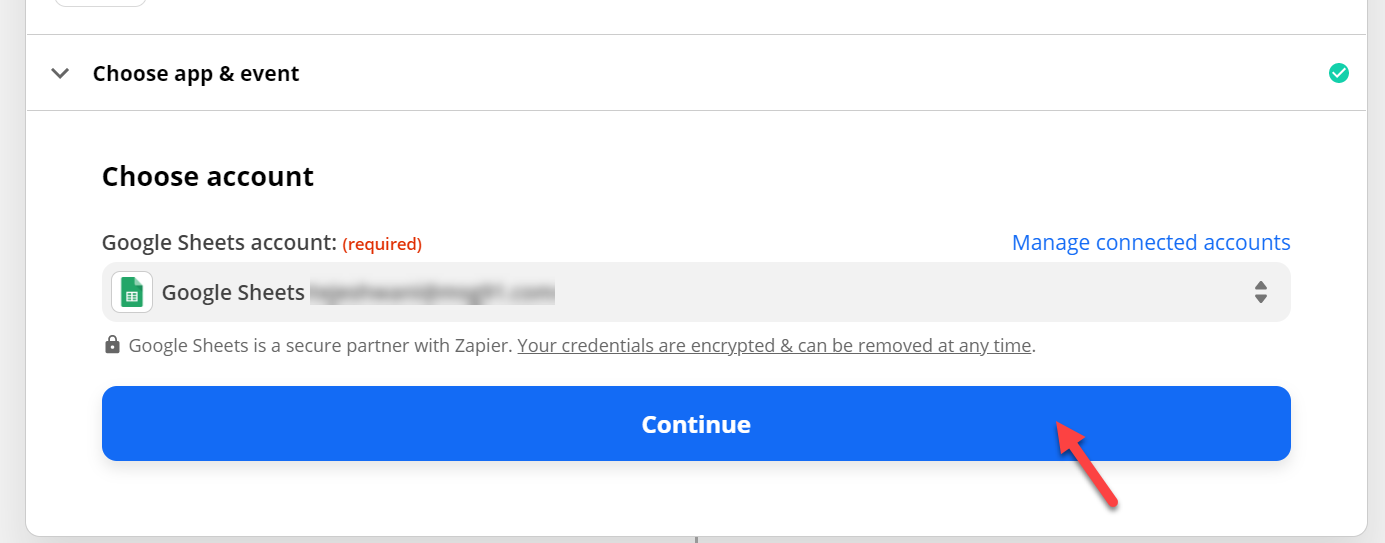
5. Now Sign in to Google sheet or select an account from the drop down list under ‘Choose Account’.
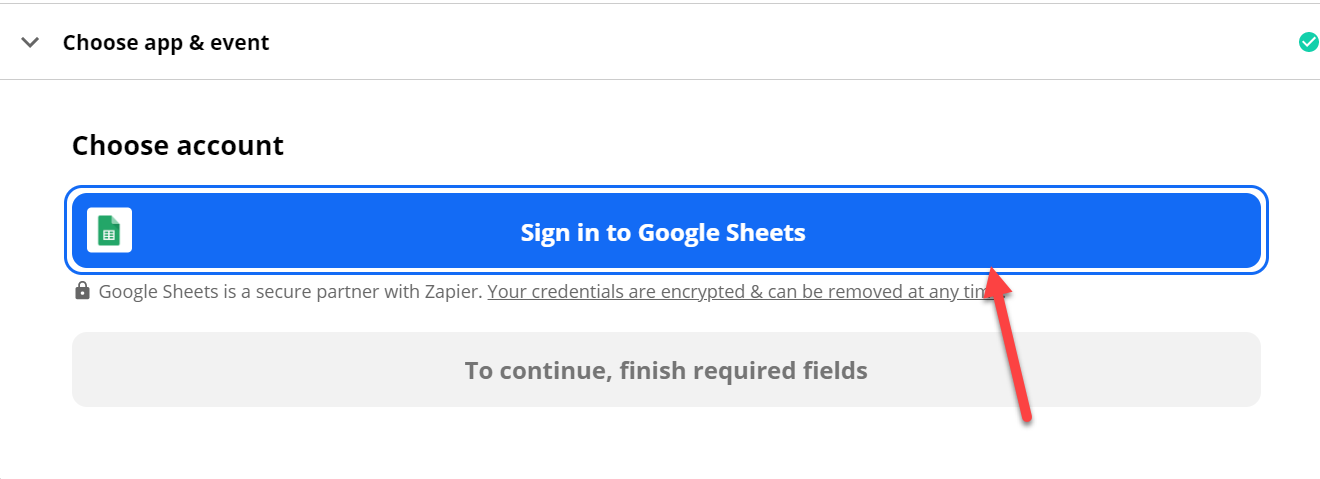
6. Click on ‘Continue’
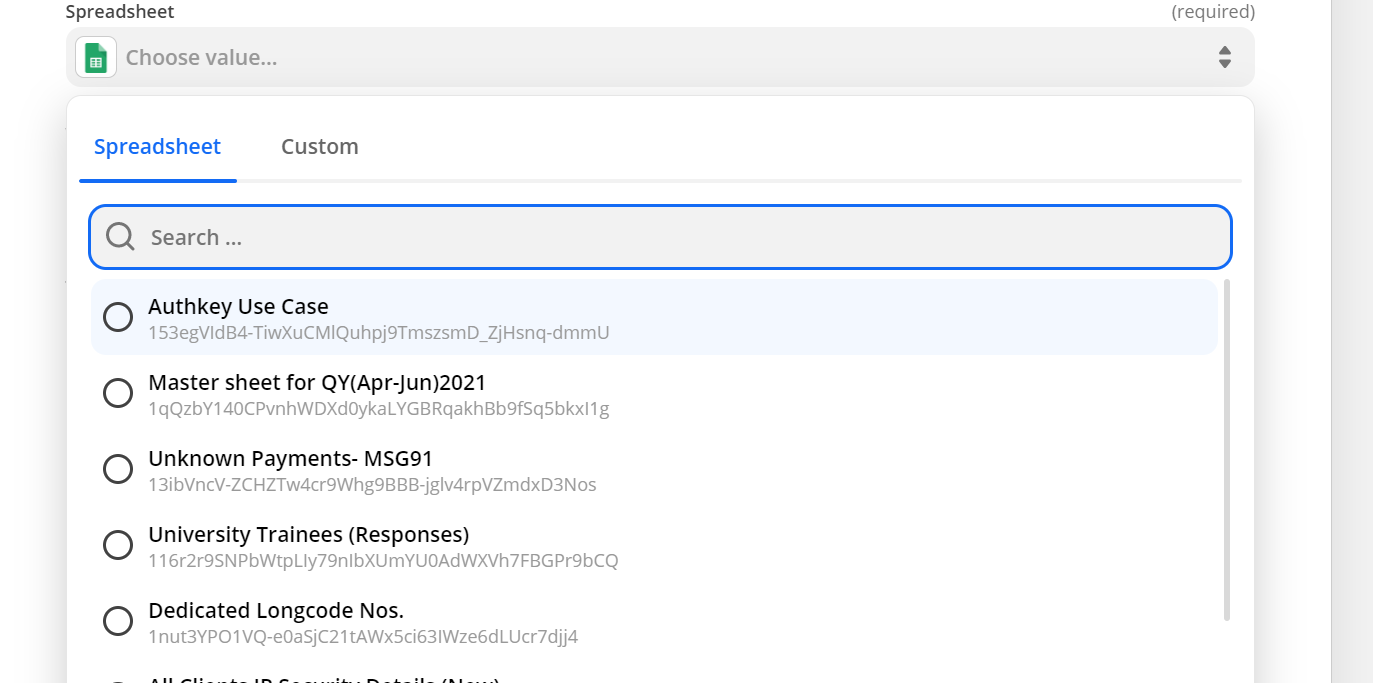
7. Choose a spreadsheet from which you want to take the value under the ‘Set up trigger’ tab. Add details to the google sheet
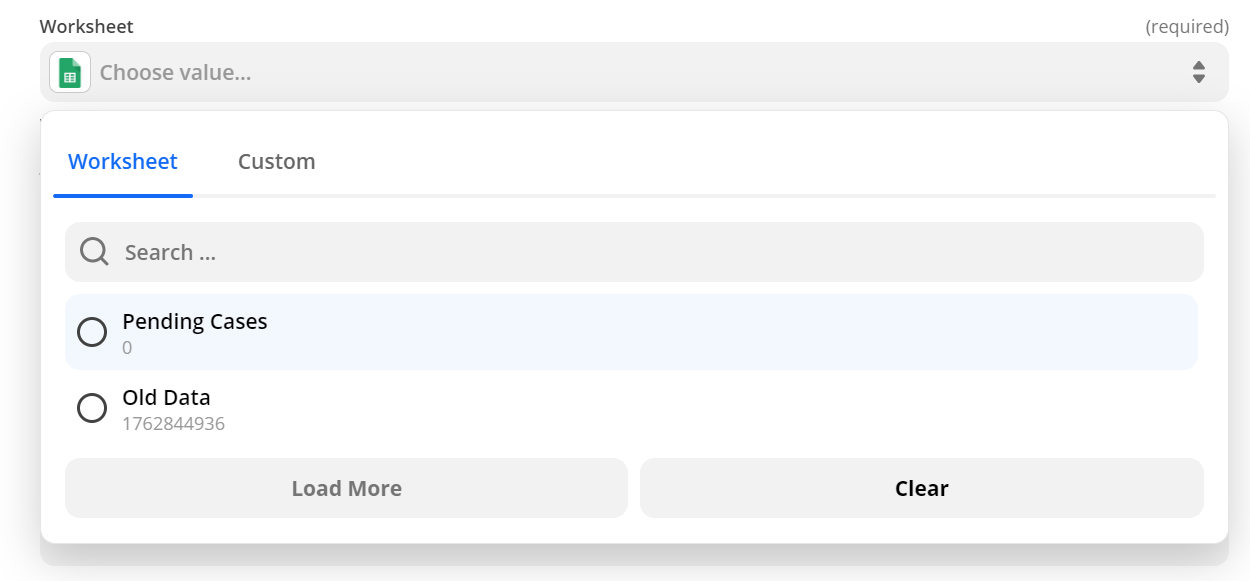
8. Next chose value from the drop down list under ‘Worksheet’. It is applicable if you have multiple sheets in an excel. An excel should be spreadsheet.
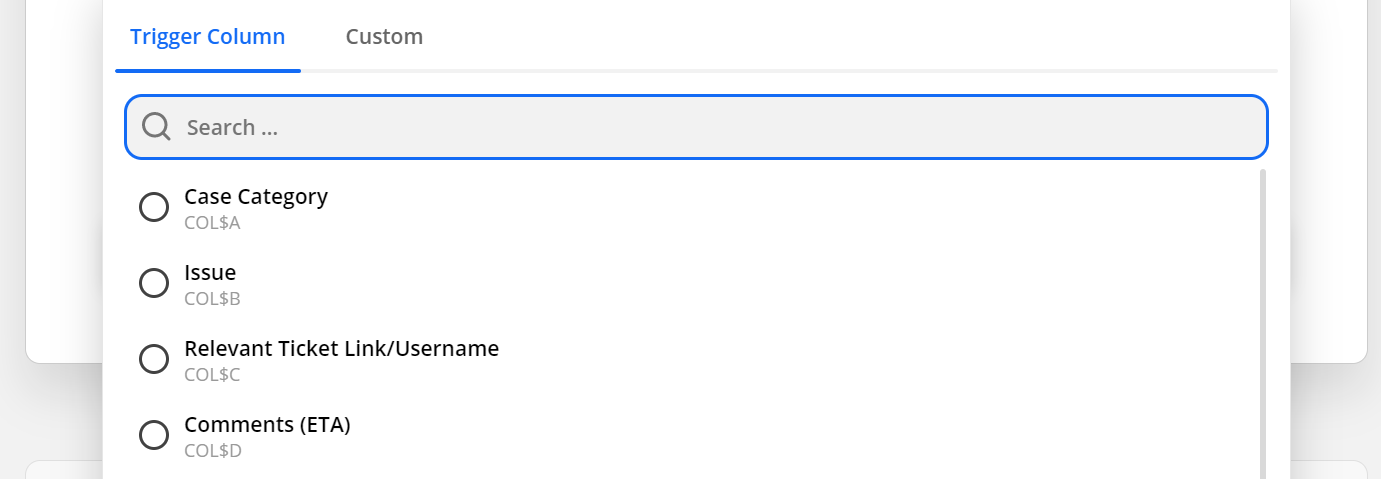
9. Now choose a column name from the drop down list under ‘Trigger Column’ and choose the column and click on ‘Continue’
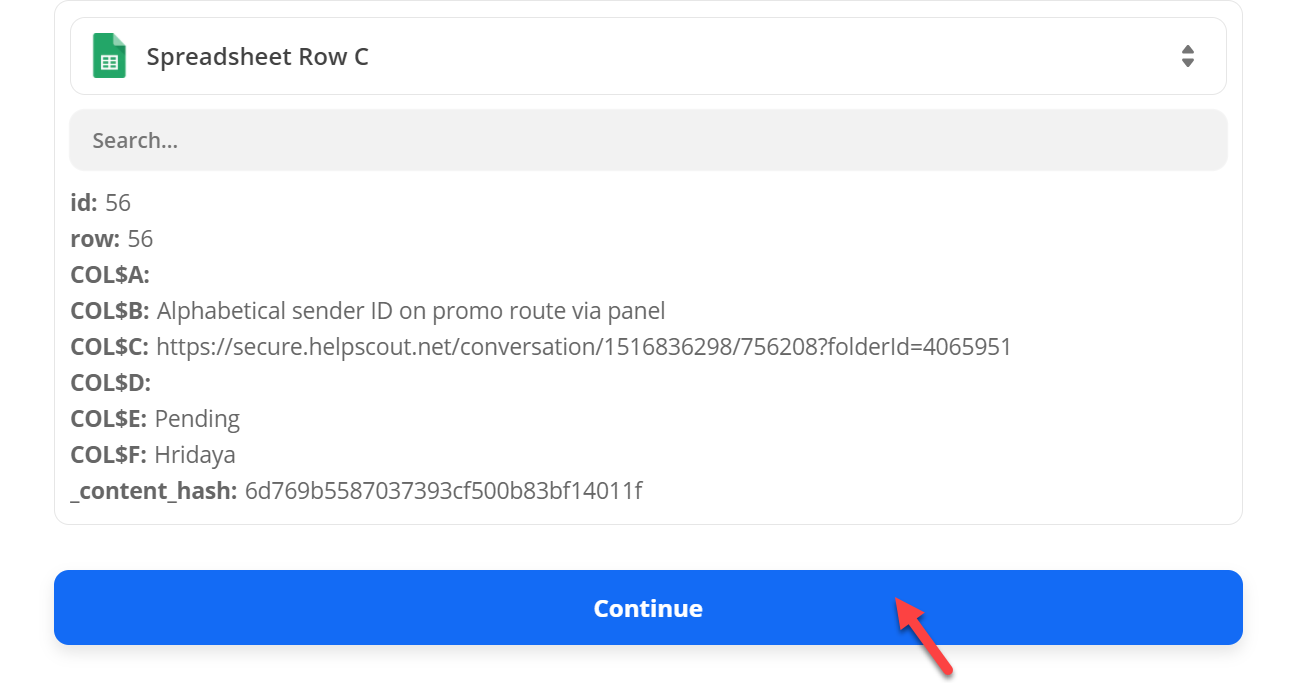
Note: You can check if your trigger is working properly by clicking on the ‘Test Trigger’ option.
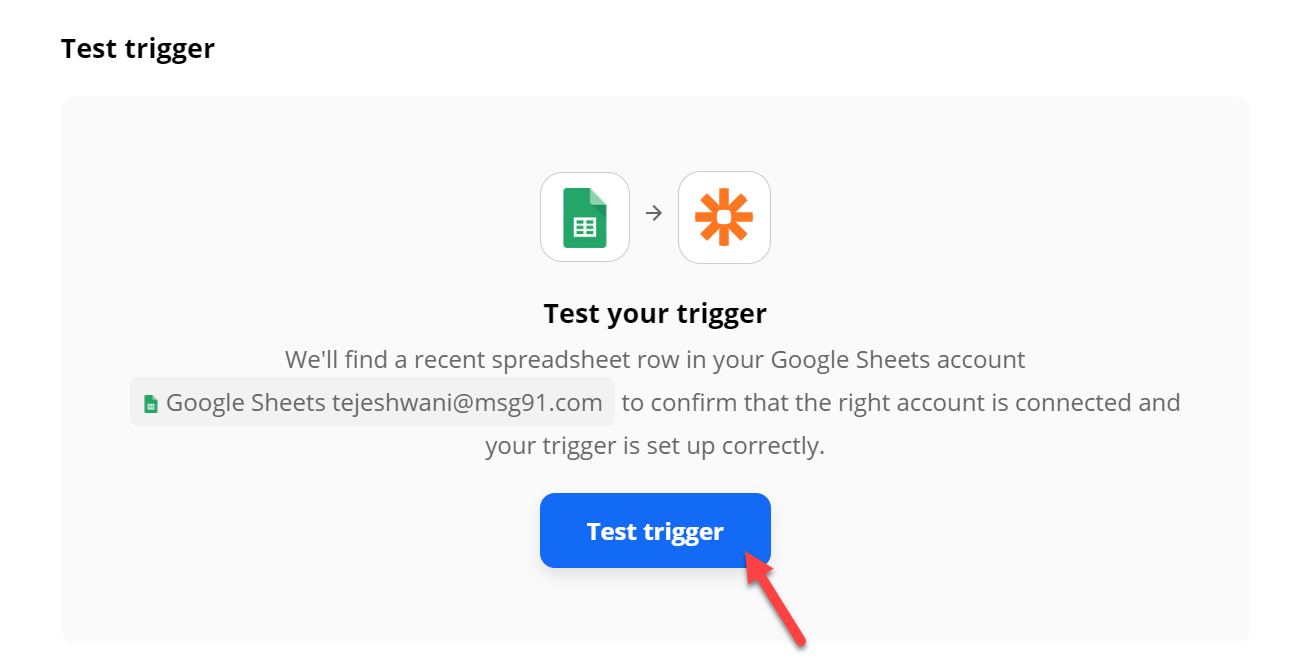
10. Once you’ve made sure that your trigger is successful, click on the ‘continue’ option.
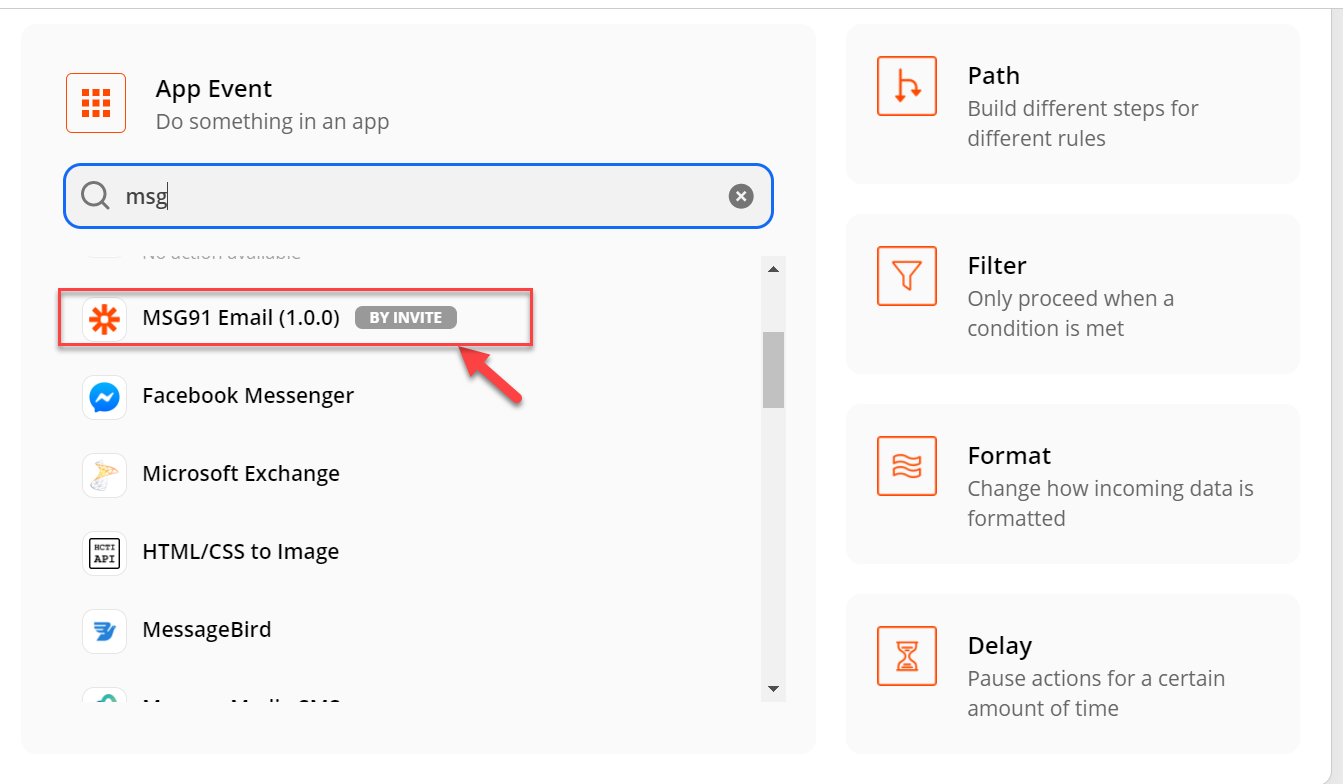
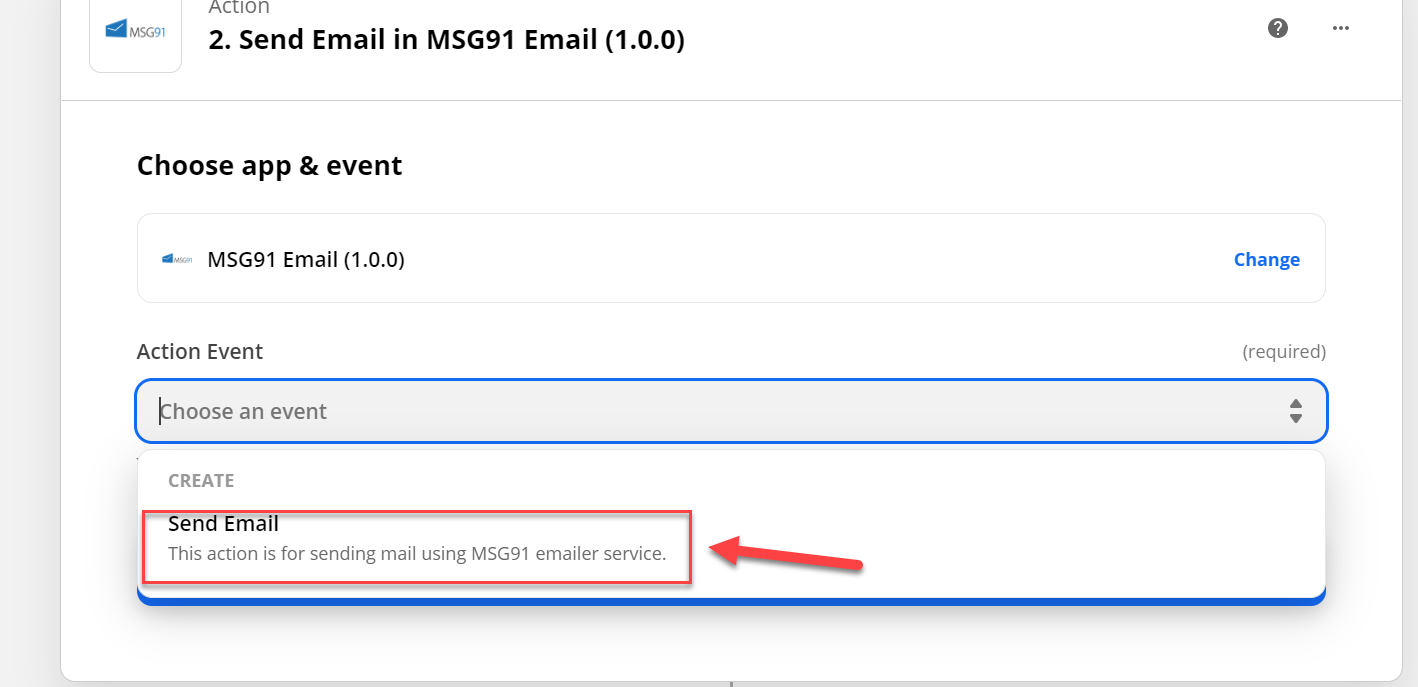
11. Now search and select ‘MSG91 Email’ from the drop down list under ‘App Event’ of ‘Action’ tab.
12. Now choose ‘Send Email’ from the drop down list user ‘Action Event’ and click ‘Continue’
13. Next you need to click on ‘connect a new account’ option under ‘choose an account’.
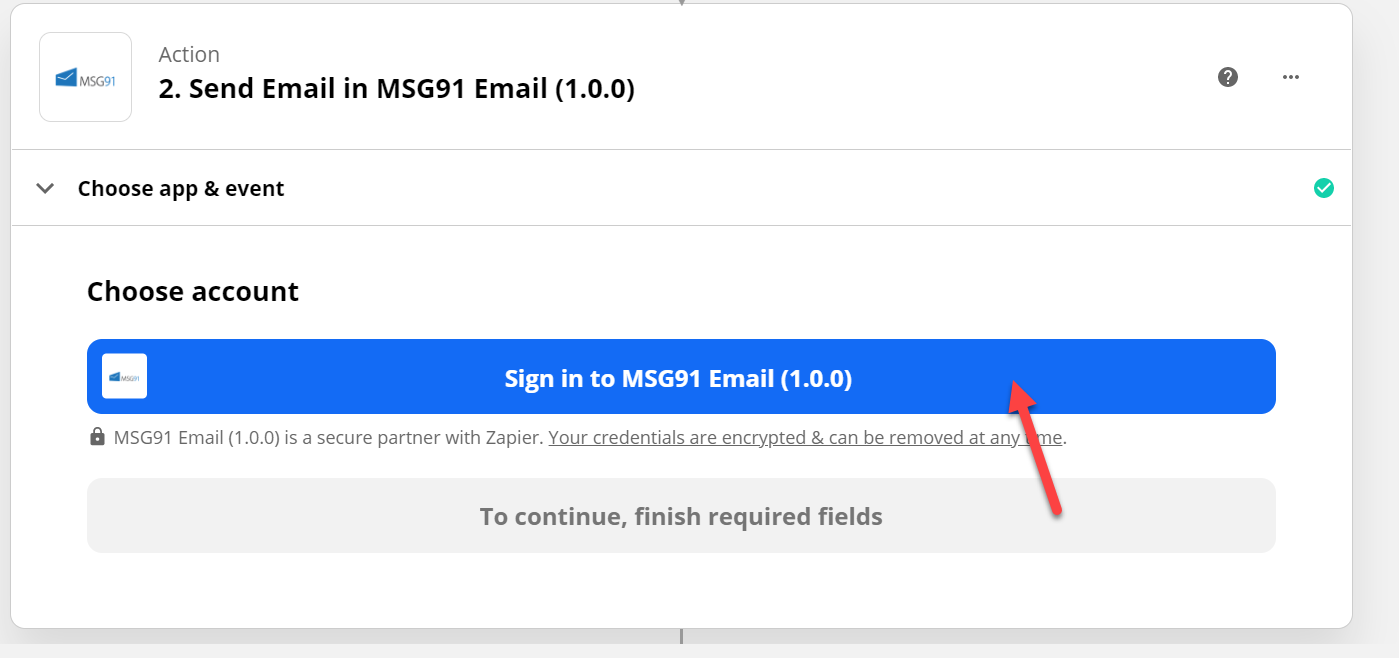
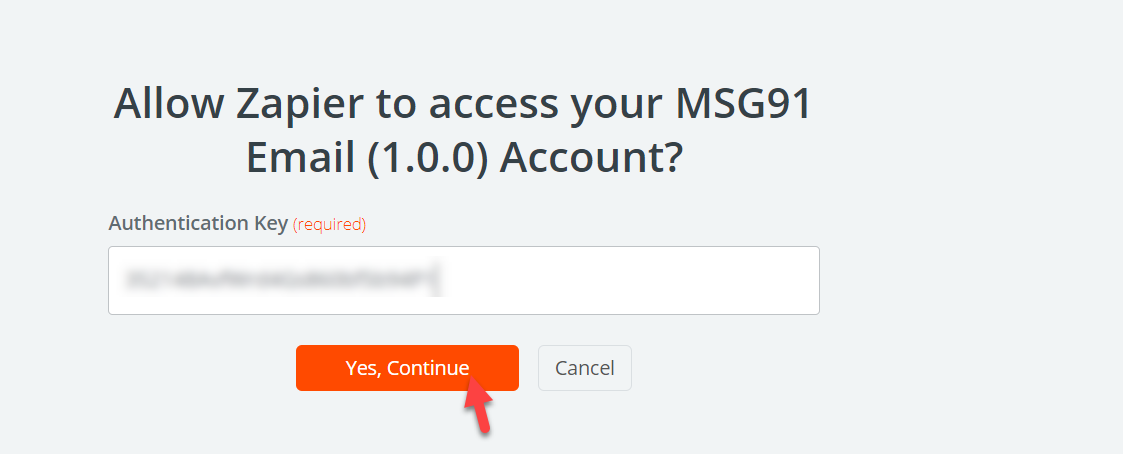
14. Add your authentication key and select ‘yes continue’ to create a new account. You can get Authentication Key from your One API>> API
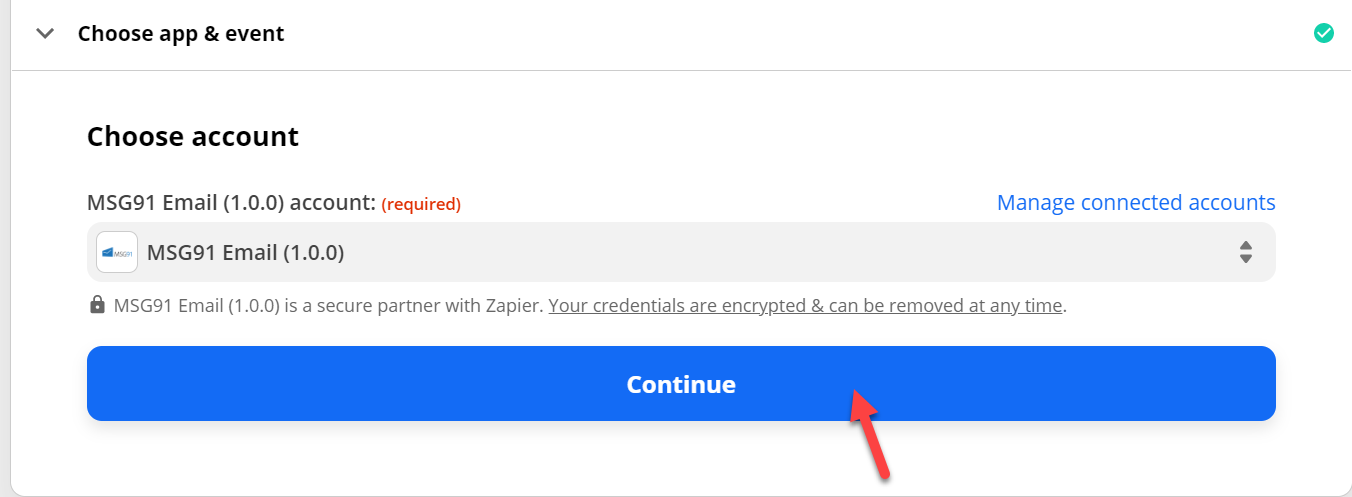
15. Once your new account has been created click on ‘continue’.
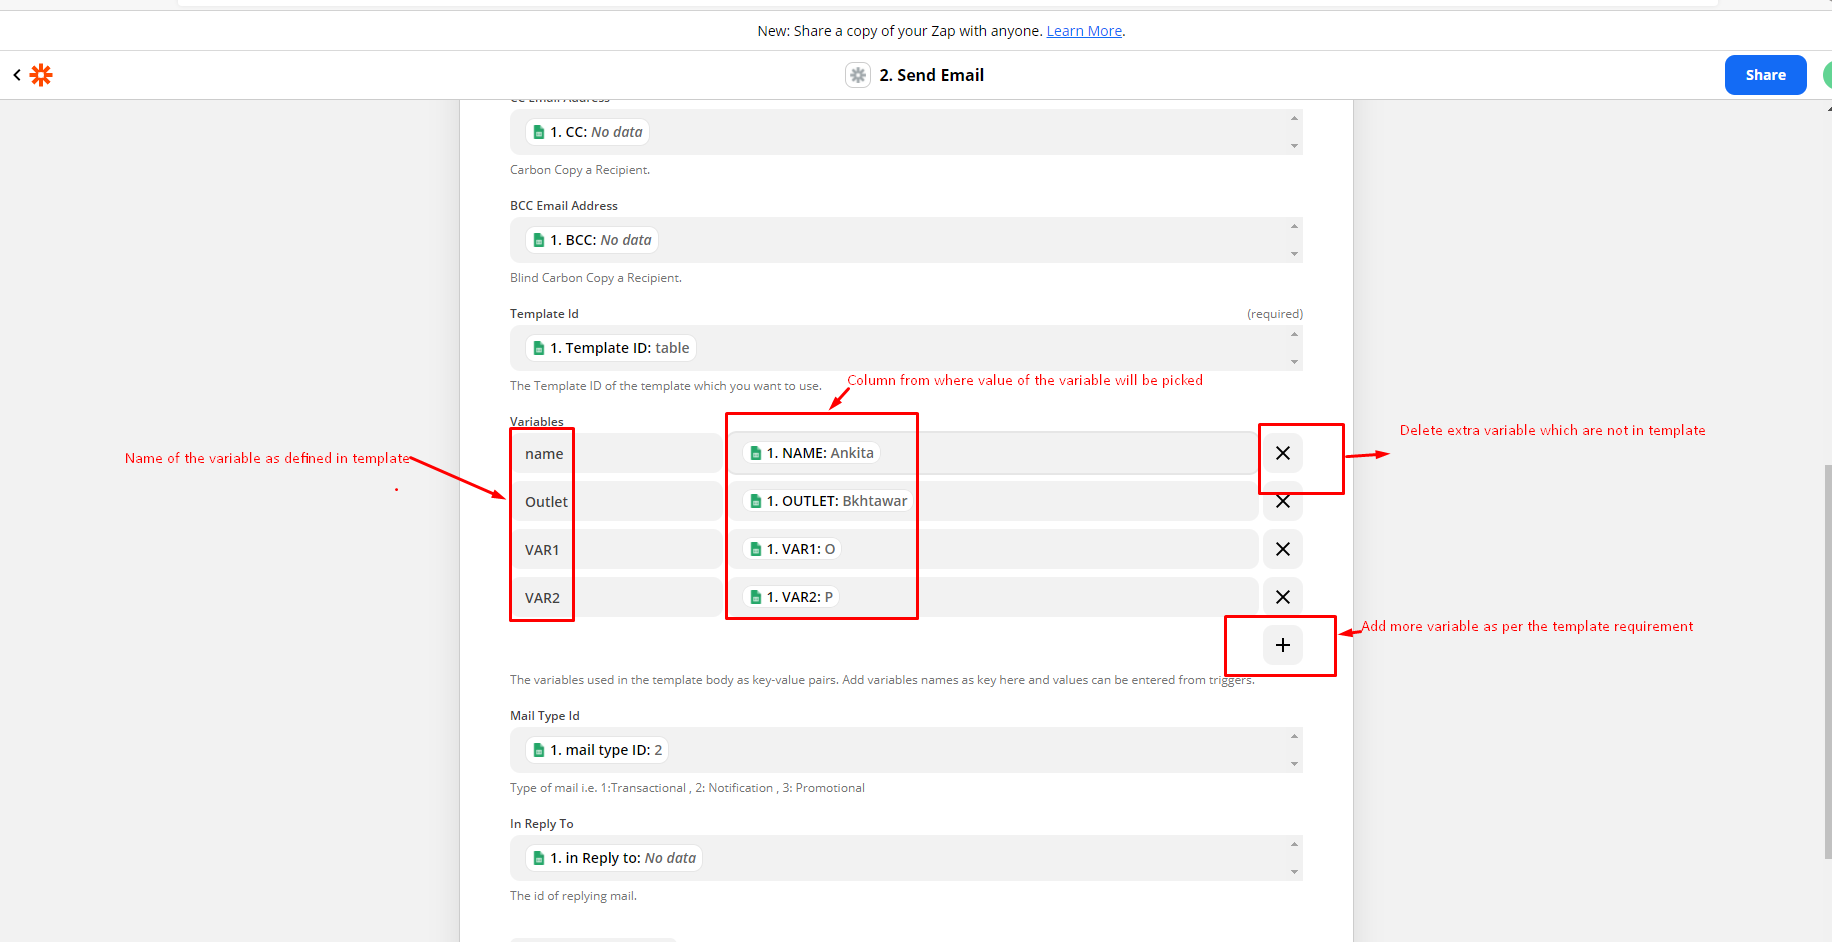
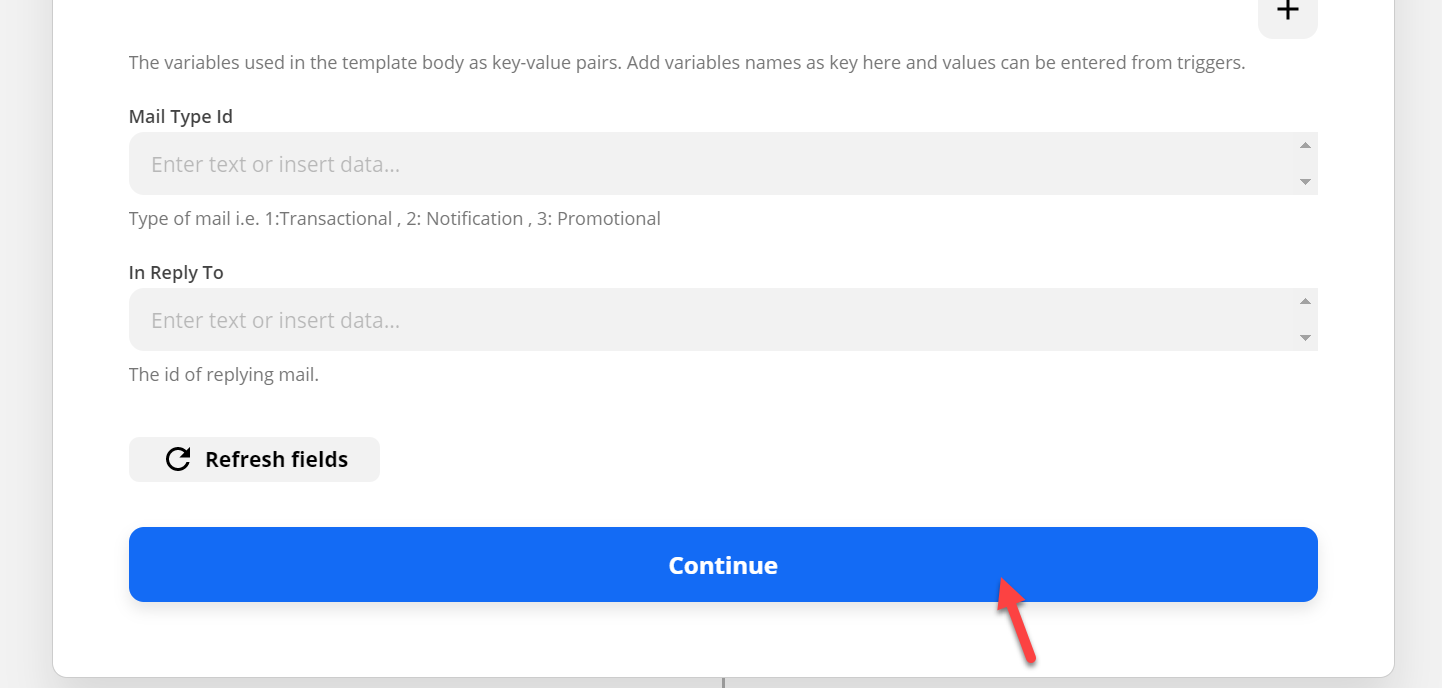
16. Go to ‘set up action’ tab and start selecting your chosen columns individually from each drop down lists under ‘From Email Address’, ‘From Name’, ‘To Email Address’, ‘CC Email Address’, ‘BCC Email Address’, ‘Template Id’, ‘Variables’, ‘Mail Type Id’, and ‘In Reply Id’ respectively.
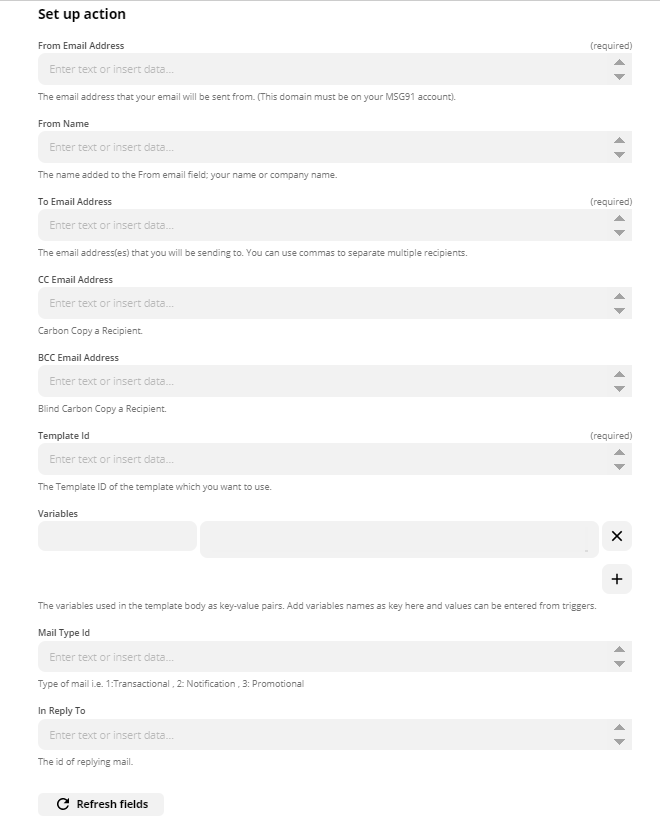
17. You can add individual variable details in column and set up action for that.
18. Click on ‘continue’.
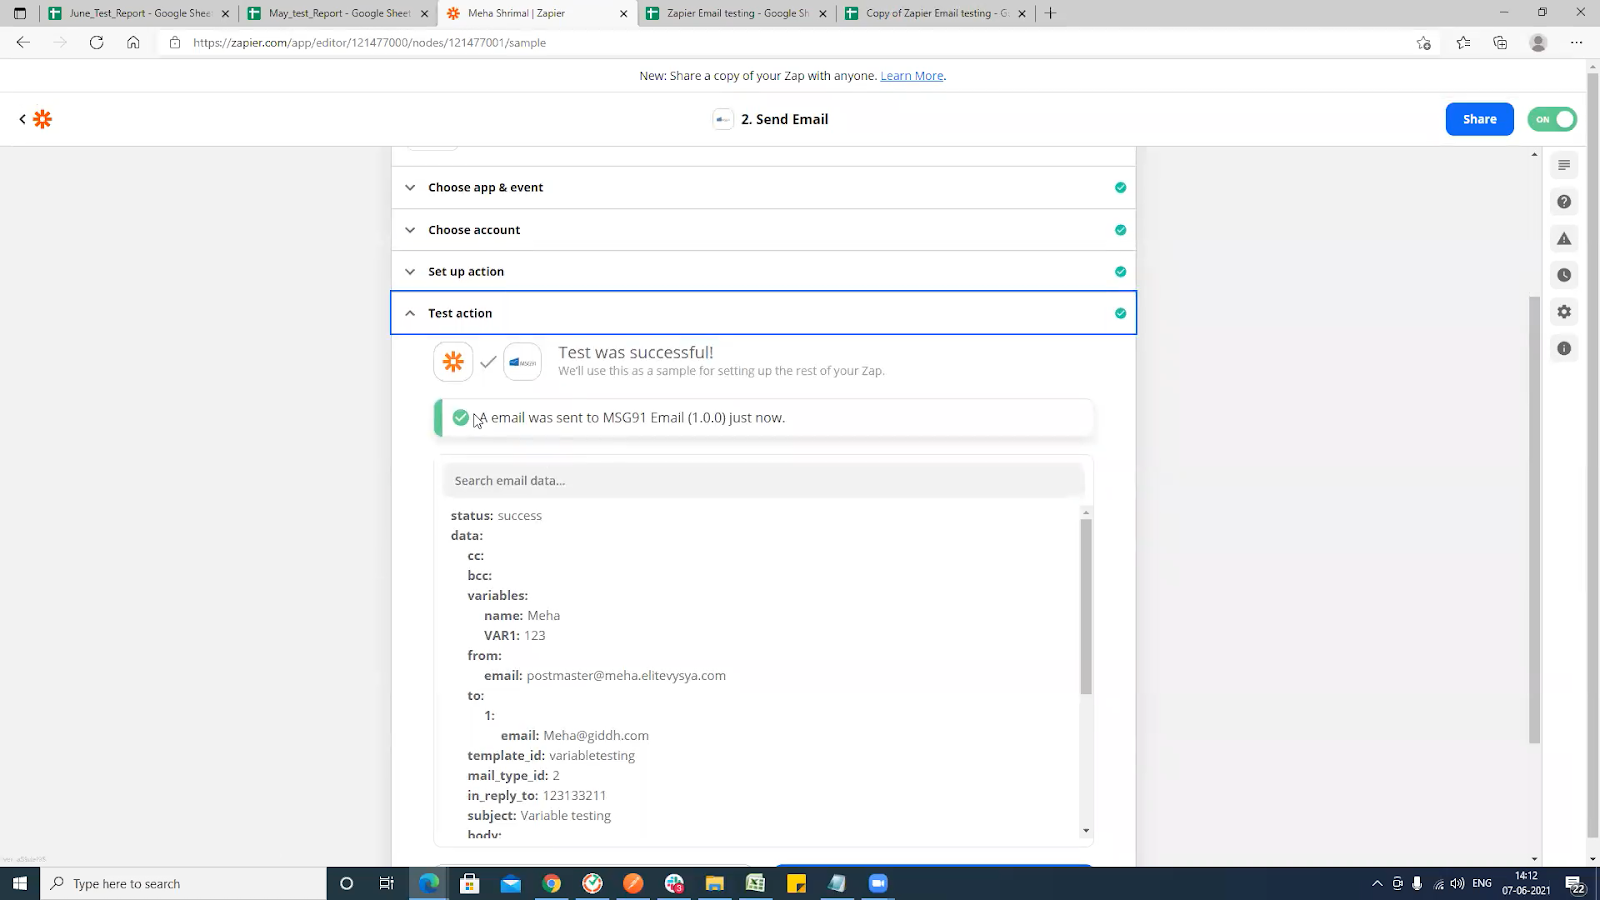
19. Now you’ll be directed to a ‘test action’ tab and by clicking on ‘test & continue’, your emails will be sent successfully.
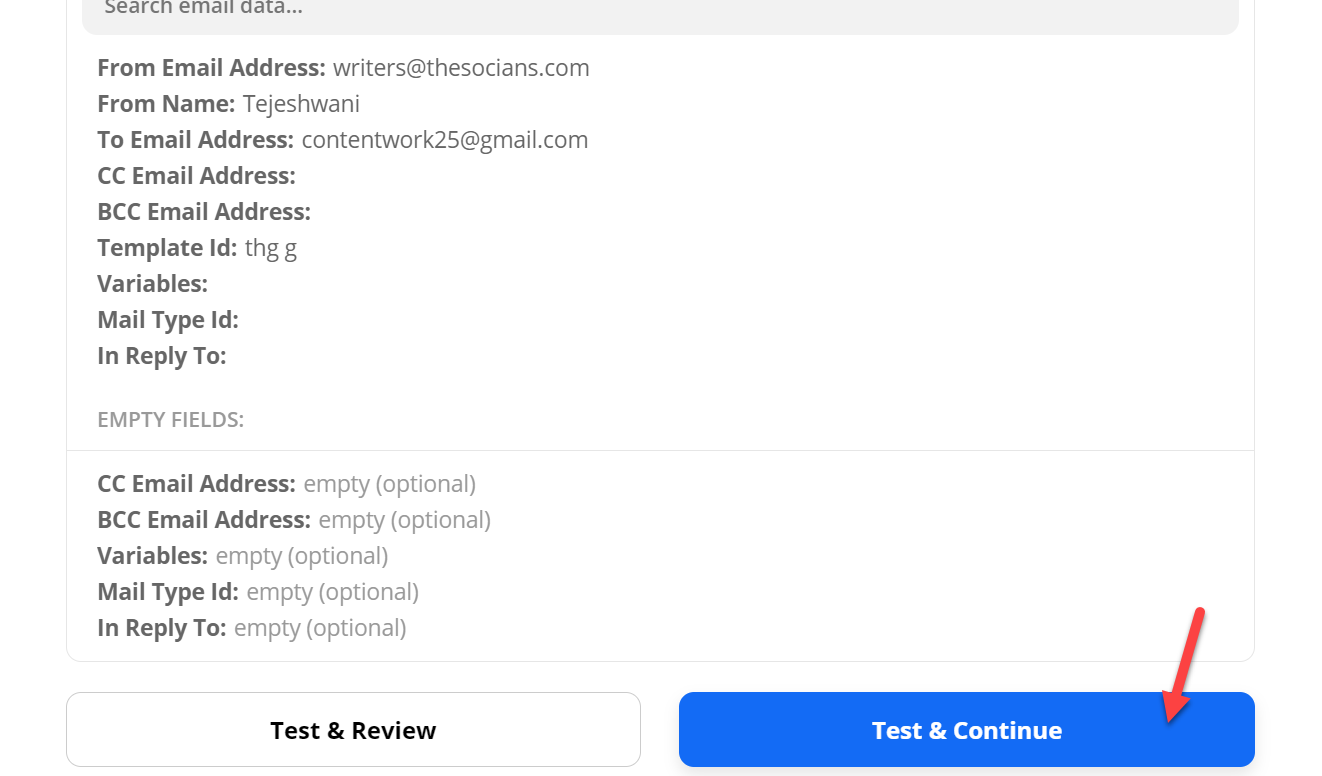
20. Ones the test is successful, it will show as successful.
21. Click on ‘turn on zap’ and you are done.
Note: To shoot mail, update column which you have set as trigger column mail will be shoot on the details added to that row